Showing posts with label sewing. Show all posts

Sunday, February 10, 2013

Seam Ripper! First Step to Improvement!

Too wide on front!
Too narrow on back!
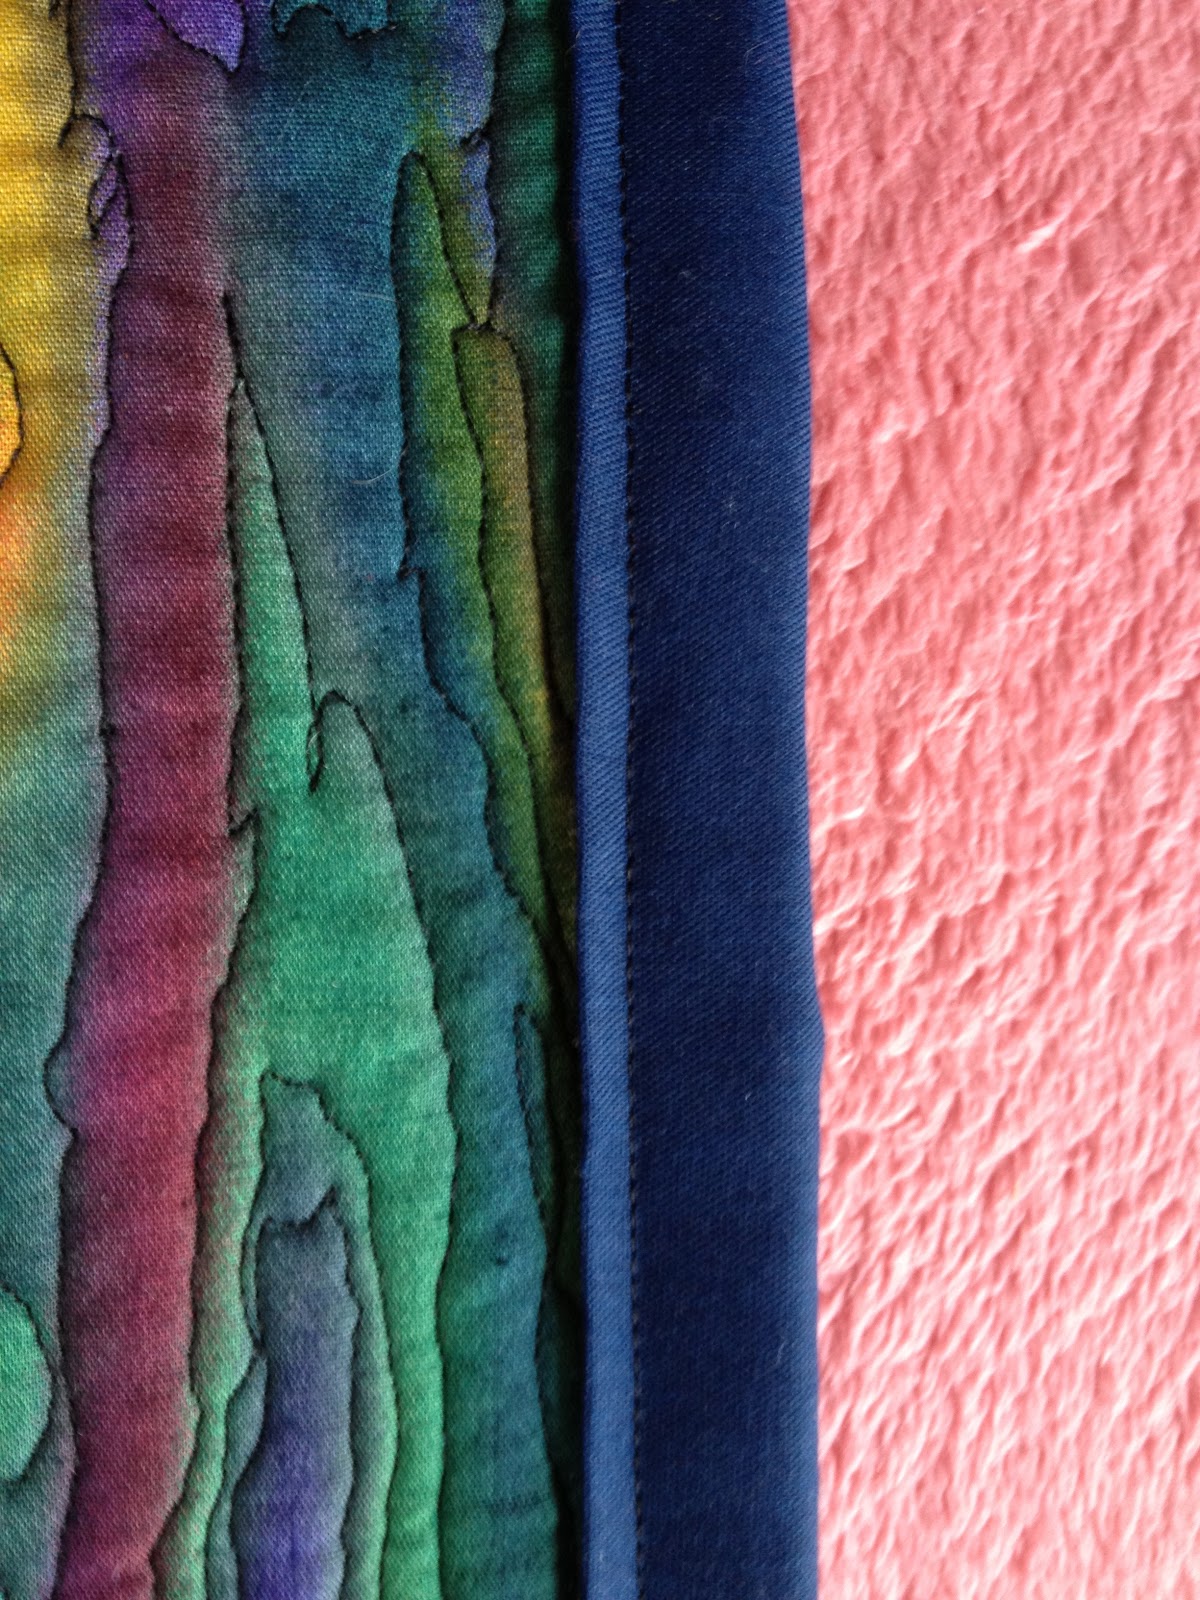
I would love to have said, "Seam Ripper, First Step to Perfection," but I know it's just improvement. And with this in mind I have taken my little quilt hanging, "Sunset Reflection on Lake" and removed the binding!  I was never happy with it, even though I called it finished and posted it on Flickr!  It was not finished because it was not done correctly!

I had followed the instructions for sewing a binding on with a sewing machine, just like the first two; however, I didn't do the the first seam correctly.  It was right on the edge, barely catching the fabric along the edge and then when I turned it to sew on the front, it was way too big!  It covered too much of the quilt.  Some of the colors along the edges were missing and I knew it.  I had this huge binding on the front and almost nothing on the back and I still called it done!

Well, suddenly today I couldn't stand it.  I was looking at the picture of the quilt prior to binding and after and thought, "it's time I pull out the seam ripper and start this over. And I did!

I'm may rethink the color of the binding and may change it, but even if I reuse this, it will be seamed correctly on the back, so that the binding on the front is of equal size and correct.  It only took about fifteen minutes to remove this and I will forever be thankful that I did it.

I would normally beat myself up for doing it wrong and then leaving it, but not today.  I just see it as part of the learning process and proud of myself for being willing to fix it! And, so I'm leaving this post for a few minutes (hopefully) and a binding on my quilt.  When I come back, I will add a picture of the "new" finished quilt.   Too late for the challenge, but not to late for me!

Sunset Reflection on Lake - Binding redone, proper size!
 And here it is, all finished!  I went with the same binding, just put on correctly and I'm so much happier.  It's still far from perfect, but it's just my third, well, now I guess it's my fourth binding and I will get better and now, the colors show properly.  The binding was so big, that it blocked out some of the colors like down in the bottom left corner and upper right, specifically.  I am satisfied!

Monday, February 04, 2013

Project Quilting - Bonus Challenge

I am posting today for Kim at Project Challenge.  You've heard me talk about the weekly challenge, but this is all about a bonus challenge for those of you who want longer than a week to create a quilt.  There's a bonus fat quarter bundle for this challenge, well, let me just let Kim tell you all about it:

Hello everyone!  This is Kim from Persimon Dreams, www.PersimonDreams.com, and I’m so happy to be here sharing some exciting Project QUILTING news with you.  We are currently in the midst of Season 4.  The first two challenges inspired over 100 quilts to be created – so amazing!  The third challenge went up on Sunday, February 3rd and I can’t wait to see what comes from it (still time for you to join in!)  
I personally love Project QUILTING because it has been extremely inspirational to me in my quilting journey.  I know I only have a week for the projects but it’s a great opportunity to give ideas in my mind a try – see what happens, try new techniques.  If it works…maybe I’ll do a bigger project that takes more time.  Project QUILTING has me creating pieces I never imagined before, it brought me out of the only making ‘what I think will sell’ and in turn, and the Project QUILTING community has been such an inspiration and support.
I have heard from many that they love watching along with Project QUILTING and the projects created from the challenges but they just can’t fit making a quilt in just one week.  That’s what my exciting news is all about today – a new *Bonus* Project QUILTING Challenge.  I’ve teamed up with a fabulous online fabric store – The Fat Quarter Shop to bring you all the ‘Fat Quarter Shop Bundle Challenge – Tradition Times Three’:  http://www.persimondreams.com/2013/01/bonus-project-quilting-challenge-fat-quarter-shop-fabric-bundle-tradition-times-three.html  
Diane outlines what is required for this particular challenge.  You must go to the Fat Quarter Shop to by the fabric bundle (http://www.fatquartershop.com/store/stores_app/Browse_Item_Details.asp?sid=570110135227570&Store_id=499&page_id=23&Item_ID=87597&Parent_Ids=) 
in order to complete the challenge BUT the twist is – you have until May 30th, 2013 to submit your challenge!  At that point, one of my girls will randomly draw a winner of $75 to use at the Fat Quarter Shop.  
I also wanted to share with you a few ways you can save on your fabric bundle.  First – head over to my blog and enter in the giveaway I posted today:  http://www.persimondreams.com/?p=4082 
OR if you want to save 20% off your entire purchase of fabric from the Fat Quarter Shop check out this blog post: http://www.talkintuesdays.blogspot.com/2013/01/talknt-jan-29th-fat-quarter-shop.html to find the special code – good through February 10th.
~Kim Lapacek

Don't miss out on this opportunity to save on this bundle and join the challenge!

Tuesday, January 01, 2013

The Beginnings . . . .

Well, my first bird is cut out!  I used my pretty felt for the top and look how the beak shows up.  I can't believe it - just laid it down and punched it out!  Some things just happen and it's so great when they do. I used some thick black felt for the back, but I'm far from joining the parts together. I quickly learned I had completed the easy part, now it was time to struggle a little!

 I made a few little stitches along the tail to give it definition and then I began the stitches along the wing.  I put stitches in and took stitches out.  I looked at my old bird and studied the type of stitches. I pulled out my book, "Fabric Embellishing - The basics and beyond" by Liz Kettle, Ruth Chandler, Heather Thomas and Lauren Vlcek and found the section on hand stitches!  If you like to do hand stitching and embellishing, it is a must have, check it out.


Anyway, I identified the stitch as a blanket stitch and began!  Then I began again and again.  I have an appreciation for the stitching on the old pincushion that I did not have before tonight!  I now have about six stitches in and shut it down for the night!  After all tomorrow is another day!

I am just amazed!  The stitches on the parrot's wing are soooooo tiny and so exactly spaced!  Mine are neither tiny or exactly spaced!  I have to laugh at myself and my comments in last nights post!  I may eventually make a similar pincushion to the original parrot, but I won't ever think it will be easy or fast!  Just making the pattern will not be as easy as I thought last night. And make enough to give away, well that may be a totally different story!

For now I will practice my stitches on this first bird and probably a number of others and just see what happens.  Thanks to Liz and Ruth for their help - couldn't even think about doing this without them!

I'll be  back when I've done a little more (praying it becomes easier), so  until then happy creating!

Sunday, September 30, 2012

Rainy Day Helps Pumpkins Grow!

What a dark rainy day!  Held off on the trip into town for the plywood and worked with what I already had started.  I put a base coat on the pumpkins to block out the woodgrain and began to paint!  I have the front of two medium pumpkins complete and I love them.  I said complete and that's not quite true - they are painted!  I still need to add the wire for hanging and add some of those adorable little curly cues.  The back is now orange and the stem painted and I'm going to add the face decals later tonight or tomorrow.  With the rain I want to let the pieces have some extra drying time.  They're in my craft room, but still, really dry is very important.

I headed out to "manland" to help Bill for a few minutes and here came another downpour, so I cut out a couple of small pumpkins to make pins!  You know for your coat or jacket.  I think they would be super cute on a blue jean jacket!  Bet you get to see one modeled soon!  Right now they're drying - got them painted and now I wait!

I learned something else today!  A life lesson of sorts.  My mom loved to sew and my cousins do too!  Judy, who will be here in just a few weeks for the quilt show loves to sew and she has fabulous machines.  I would like to love to sew, but just don't.  I can do it and I used to do it well, but it just doesn't give me joy.  I bought a felting machine a couple of years ago (quilt show) and thought I would use it constantly, but it's not what I thought it would be, no joy!  But, today when I turned on that saw and began to cut out these little pumpkins, I suddenly knew how Judy feels when she sews!  Guess all that time in my Dad's workshop as a little girl set this in motion, but I just love it.  I love the smell of the wood as it's cut,  the sawdust, even the sound of the saw as it cuts through the wood! And painting well, that's the real joy of my life!  I love the feeling of God moving my hand across the paper or now the wood!  To God be the glory for through Him comes true joy!

I did two small 3.75" x 5" watercolors - one represents abundance - okra (freezing the extra at this point) and a cornucopia of veggies - representing Thanksgiving - my favorite holiday!

I'll be back soon with the back of the pumpkins and hopefully the large pumpkins painted!


Related Posts Plugin for WordPress, Blogger...